
On a hot summer’s day, is there anything more delightful than hearing the ice-cream truck music?
Followed by the shouts of excited children echoing down the street! Just hearing the jingle makes me think of summer and a delicious ice-cream in a cone! With this hack, now you can create your own!
INGREDIENTS
- 1 x 20cm round cake (see pages 10–13)
- 1 x batch Tigga’s buttercream (see page 15)
- pink gel food colouring
- teal gel food colouring
- 4 white Iced Tic Toc or similar biscuits
- 1 x 50g packet Smarties
- 7 square Arnott's 100s & 1000s biscuits
- 3 x rectangular ice-cream wafers
- 1 x ice-cream cone
Equipment:
- 30cm round cake board
- 1 piping bag
Cut the Cake:
Okie dokie, get excited because this is one of my absolute favourites! Following the cutting guide, cut the cake directly in half down the middle. Piece 1 is the base of the truck. For the second cut, slice down diagonally to create the windscreen on piece 2, which will be the cabin. The remaining bit – piece 3 – will be used to make the ice-cream cone.
METHOD
-
First make the coloured buttercream – remember to add the food colouring a little at a time until you are happy with the result. Scoop ⅓ cup of buttercream into a bowl and colour it pink. Colour the rest of the buttercream teal.
-
Spread a little buttercream on the cake board where the cake will sit. This will be the glue that stops the cake from moving around while you are decorating it. Secure the larger cake piece (1) on the cake board.
-
Now, use a layer of buttercream to stick the next piece (2) on top, making sure there is space left at the front for the truck bonnet.
-
Cover the entire cake with teal buttercream, smoothing out using a palette knife and scraper. This is the crumb coat. Chill in the fridge for 10 minutes or until firm. Add a second coat of buttercream, using a palette knife and cake scraper to create a smooth finish. Chill once more in the fridge until firm.
-
To give the illusion the truck is sitting off the ground, mark a line along the side of the cake about 1cm up from the cake board. Using a sharp knife, carve diagonally from here into the base of the cake on all sides.
-
Attach the 4 round white biscuits onto the sides of the cake to make the wheels. Using buttercream, pop a purple Smartie in the centre of each wheel.
-
Use 2 yellow Smarties on the front for headlights and 2 pink Smarties on the rear for brake lights. For the windows, place 2 square 100s & 1000s biscuits on both sides of the truck. Now, for the windscreen, place 2 more square 100s & 1000s biscuits side by side on the front of your cabin. Lastly, add your remaining biscuit on the back of your truck as the rear windscreen.
-
Cut an ice-cream wafer in half lengthways and fix each one to the cake to form the front and rear bumpers.
-
To create the open awning, use a wafer and stick it into the cake so it extends out over the serving window. Cut another ice-cream wafer in half lengthways and secure one half underneath the front window as a ledge. Use the other half as an awning over the windscreen.
-
Now it’s time to make the scoop of ‘ice‑cream’ that will sit on the top of the cake. Smoosh the remaining piece of cake (3) into a ball and place on the roof of the truck. Heat the pink buttercream in a microwave-safe bowl in 10-second bursts until it reaches a pouring consistency. The melted buttercream should be runny, but NOT hot. If it is too hot, it will melt the buttercream icing, so allow it to cool before pouring it on!
-
Next, mix the melted buttercream well and very gently spoon it over the ball of cake to create a melting ‘ice-cream’. The buttercream should cover the ball and pool on the top of the truck. If it drips down the cake a bit, that’s okay! Add the ice-cream cone, making sure it’s on an angle with the point facing the rear of the truck. And there you have it! You scream, I scream, we all SCREAM for ICE CREAM!
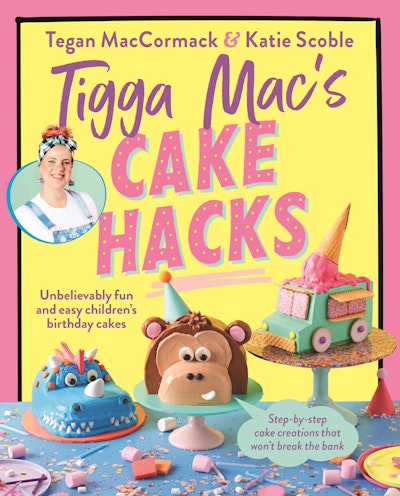
Solve the kids’ birthday cake dilemma with 30 achievable, affordable and amazing-looking cake hacks from internet sensation Tigga Mac!

This spooktacular cake from cake baking sensation Tigga Mac will be the star of the show at your Halloween party. It's also a great recipe to make with kids for a fun Halloween activity.

From their furry little bodies to their creepy crawly legs, it’s easy to see why people run scared. But our spider is the exception!

Follow the blood trail and be prepared to be GROSSED OUT! The perfect trick or treat at any spooky celebration!


Comfort food with a Desi twist, this rich, spiced butter chicken is folded through creamy, cheesy macaroni for a fusion that’s both indulgent and seriously satisfying.

This light meal option is packed with lean proteins, herbs and citrus for freshness.

The first time I put amatriciana on the menu at Tiella I was incredibly nervous.


You might think this is absurd, but I miss my rhubarb plants in Copenhagen.

Self-saucing pudding is exactly what I want when I'm suggesting 'a little something sweet.

I absolutely love a fresh cinnamon roll, so it only felt right to turn it into a cookie.
