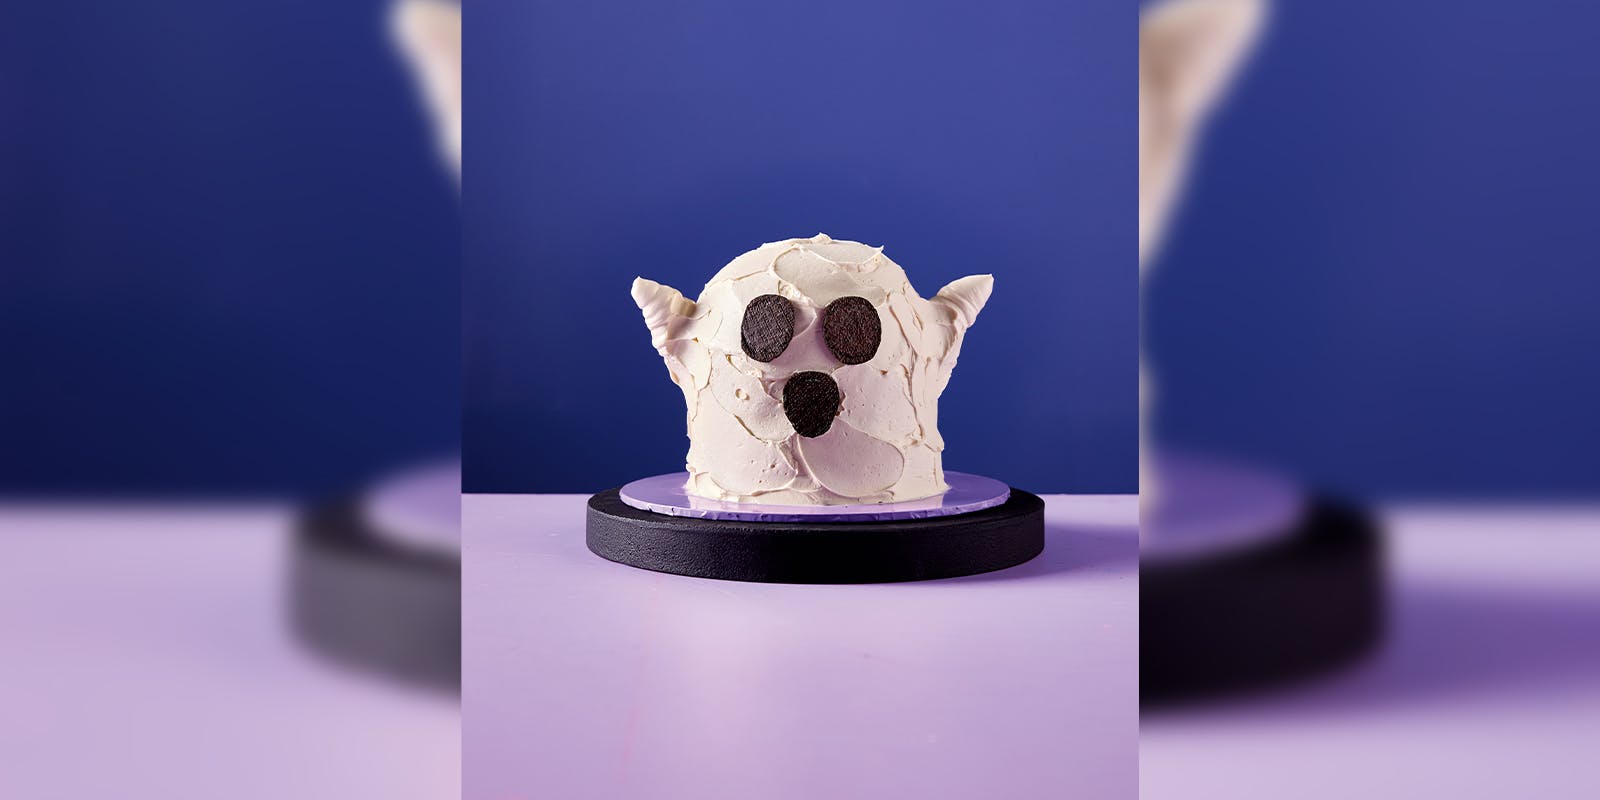
This spooktacular cake from cake baking sensation Tigga Mac will be the star of the show at your Halloween party. It's also a great recipe to make with kids for a fun Halloween activity.

Do you believe in ghosts? Even if you’re a non-believer, things are about to get a little spooky! Our friendly little ghost will be loved by girls, guys and GHOULS of all ages. Let this sweet spirit haunt your next party!
INGREDIENTS
For the vanilla velvet cake:
- 125ml canola oil
- 375g caster sugar
- 2 tsp vanilla extract
- 1 tsp vinegar
- 300g self-raising flour
- 1 tsp baking powder
- ½ tsp salt
- 200ml boiling water
- 2 large eggs
- 200g unsalted butter
- 250ml buttermilk
For the buttercream:
- 180ml pasteurised egg whites
- 300g caster sugar
- 240g icing sugar mixture (or sifted icing sugar)
- 620g unsalted butter
- 1 tsp vanilla extract
To decorate:
- purple gel food colouring
- icing sugar
- 3 Oreo or similar chocolate biscuits
Equipment/Essentials:
- cooking spray
- 2 x 15cm cake tins with a depth of 7cm
- electric stand mixer with a whisk attachment
- 25cm round cake board
- 1 piping bag
- 1 round piping nozzle
METHOD
To make the velvet vanilla cakes:
-
Preheat the oven to 180°C (160°C fan-forced). Using cooking spray, grease 2 15cm x 7cm cake tins and line the base and sides with baking paper.
-
In a mixing bowl combine the canola oil, caster sugar, vanilla extract and vinegar. Set aside.
-
In another bowl combine the flour, baking powder and salt.
-
Carefully measure the boiling water in a heatproof jug and add to the mixing bowl with the oil and sugar. Using a whisk, mix until the sugar has dissolved.
-
Add the dry ingredients to the mixing bowl and whisk until combined. Scrape the sides of the bowl and then mix again for 1 minute.
-
Add the eggs and mix until combined.
-
Add the buttermilk and mix until smooth. You may be concerned about the consistency of your batter, but it is meant to be runny!
-
Pour the cake batter into the lined tin. Cover the tin with foil before placing it in the preheated oven. The baking time will vary depending on your oven. We suggest setting the timer for 45 minutes, then testing the centre of the cake with a skewer. If the skewer does not come out clean, this means your cake is not fully baked. Keep checking at regular intervals until the skewer comes out clean.
-
Once the cake has been removed from the oven, wait 15 minutes before turning it out onto a cooling rack. Wrap the cake in cling film while still warm, then place in the fridge or freezer. This will keep the edges soft and maintain maximum moisture!
NOTES: This cake recipe has a runny batter and long cooking time, so we do not recommend a springform pan. We have found the recipes work best in a high-quality aluminium cake tin. Lower-quality tins may affect cooking times. To ensure your cake doesn’t stick to the tin, make sure you line your tin with baking paper NOT greaseproof paper. They are not the same thing!
To make the buttercream:
-
Using an electric stand mixer with a whisk attachment, whisk the egg whites and caster sugar to make a thick meringue. Whisk until the sugar has dissolved and the meringue has reached stiff peaks (about 15 minutes).
-
Turn off the mixer and add the icing sugar mixture to the bowl. Whisk on low until just combined and then increase speed to high until fully incorporated.
-
Soften the butter in the microwave. It should be soft but not melted.
-
Add the butter and vanilla extract to the bowl and beat for 10 minutes. (Optional: Switch your whisk attachment for a paddle attachment to beat out air bubbles and achieve a smoother consistency.) The buttercream is now ready to use!
To assemble the cake:
-
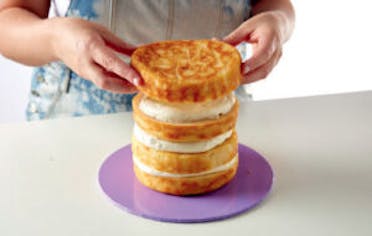
Once the cakes are fully cooled, cut each cake in half to give you four layers of sponge.
-
Stacking: Spread a little buttercream on the cake board where the cake will sit. This will be the glue that stops the cake from moving around while you are decorating it. Stack the 4 layers on top of each other on the board, layering with approximately 105g of buttercream in each layer as you go. Chill the cake in the fridge for at least 10 minutes or until firm.
-
Carving: To make a ghostly shape, you need to round off the top of the cake. Using a sharp serrated knife, carefully carve the edges of the cake away in a downward motion to create a dome shape. These trimmings are yours to enjoy!

-
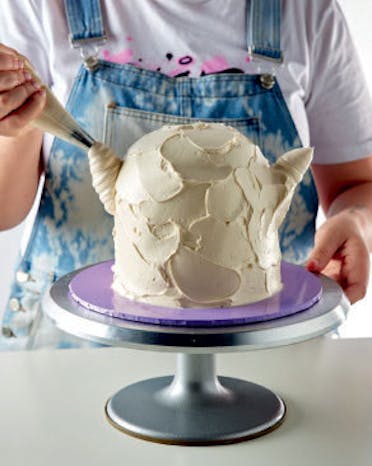
Buttercream time: Add a single drop of purple gel colouring to the buttercream to help neutralise the yellow and make it appear whiter. Roughly pipe over the entire cake, smoothing out using a palette knife. This is the crumb coat. Chill in the fridge for 10 minutes or until firm. Add a second coat of buttercream, this time making short strokes with the palette knife to create a textured finish.

-
Arms: This next step will work best with firm buttercream. If you find your buttercream is too soft, pop it in the fridge for 5 minutes to firm it up. Give it a stir before placing it in the piping bag with a round piping nozzle. You will note in the picture that the ghost’s arms are thicker at the base and thinner at the top. To create this look, pipe in an upwards motion using more pressure at the base and reducing the pressure as you move upwards. Once the arms are in place, chill the cake in the fridge for at least 10 minutes or until firm.
-
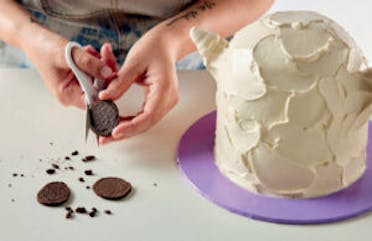
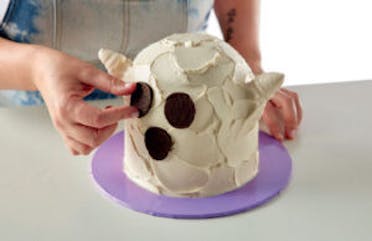
Eyes and mouth: Now it’s time to make your ghost scream! Split apart your 3 Oreo cookies and use the cookie halves with no icing. Feel free to eat the icing halves! Using scissors, shape your Oreos into oval shapes.
-
Finishing touches: Carefully put the Oreo eyes and mouth onto the cake, gently pushing them into place. This will help give the illusion of black holes in your ghost’s face.
Solve the kids’ birthday cake dilemma with 30 achievable, affordable and amazing-looking cake hacks from internet sensation Tigga Mac!

From their furry little bodies to their creepy crawly legs, it’s easy to see why people run scared. But our spider is the exception!

Follow the blood trail and be prepared to be GROSSED OUT! The perfect trick or treat at any spooky celebration!

On a hot summer’s day, is there anything more delightful than hearing the ice-cream truck music?


Comfort food with a Desi twist, this rich, spiced butter chicken is folded through creamy, cheesy macaroni for a fusion that’s both indulgent and seriously satisfying.

This light meal option is packed with lean proteins, herbs and citrus for freshness.

The first time I put amatriciana on the menu at Tiella I was incredibly nervous.


You might think this is absurd, but I miss my rhubarb plants in Copenhagen.

Self-saucing pudding is exactly what I want when I'm suggesting 'a little something sweet.

I absolutely love a fresh cinnamon roll, so it only felt right to turn it into a cookie.
